![[Tutorial] How to Run a Bitcoin Node on Ubuntu 19.10 – Updated 2020 [Tutorial] How to Run a Bitcoin Node on Ubuntu 19.10 – Updated 2020](https://fsanmartin.co/wp-content/uploads/bitcoin-1813503_1920-768x513.jpg)
Introduction
In this guide, I show you how to run a headless (command line only) bitcoin node. I wrote it because most guides I found out there are incomplete, don’t work, run only on windowed mode, or are outdated.
I have tested these instructions 2 times on a clean Ubuntu 19.10, and it works. If it doesn’t for you please comment and I will try to help.
You can build bitcoin core with or without wallet support. I suggest against using your own node to store your coins unless you really know what you are doing. Instead, a dedicated hardware wallet such as a Trezor is a much better idea.
Building bitcoin core with wallet support requires to also build BerkeleyDB 4.8.30 which has a bug that prevents compiling. I show you how to fix that bug in this article.
TL;DR A just code version of this guide is available in github.
Requirements
- A computer running 24/7 or close to that. Your personal laptop is an awful place to run a bitcoin node as it will hog resources and most don’t keep their laptops on at all times. A RPi, a desktop that’s always on, or an Intel NUC, are best. I run it on a headless home server that I access via SSH.
- Fresh install of Ubuntu 19.10. There are many online guides for this.
- A fast, unmetered, and reliable internet connection. If you have vSDL or better you are good to go.
- At least 400Gb of free HDD. Ideally more as the blockchain continues to grow. I had 500Gb.
- Bitcoin is legal in most legislations, but you should check yours before doing any of this.
Getting our system ready
Assuming a fresh install of Ubuntu 19.10, and that you are logged in as root.
First things first, upgrade your local packages:
apt update
apt upgrade -y
For security, let’s create the user bitcoin_user to avoid running everything as root.
# add a regular user to our system
adduser --gecos "" bitcoin_user
Now add superuser permissions for bitcoin_user and login as such.
# add sudo permissions to this new user
usermod -aG sudo bitcoin_user

# and create a new shell logged in as her
su - bitcoin_user
Install these packages that we will need to compile Bitcoin core. Some of these are a bit heavy, be patient.
# build dependencies for Bitcoin core
sudo apt install -y git build-essential autoconf libtool pkg-config libdb++-dev libboost-all-dev libssl-dev libevent-dev
Optional, install BerkeleyDB for wallet support
# Download and untar the package
wget http://download.oracle.com/berkeley-db/db-4.8.30.NC.tar.gz
tar -xvf db-4.8.30.NC.tar.gz

# fix the bug on BerkeleyDB
sed -i 's/__atomic_compare_exchange/__atomic_compare_exchange_db/g' db-4.8.30.NC/dbinc/atomic.h

# Configure
cd db-4.8.30.NC/build_unix
mkdir -p build
BDB_PREFIX=$(pwd)/build  # we will use this shell variable later
../dist/configure --disable-shared --enable-cxx --with-pic --prefix=$BDB_PREFIX

# Compile and install
make
sudo make install
Install Bitcoin Core
Clone Bitcoin’s GitHub repo:
git clone https://github.com/bitcoin/bitcoin.git
Now check out the latest release from Github. You can see the latest release at https://github.com/bitcoin/bitcoin/releases. Today that is 0.19.1. Checkout the corresponding git tag:
cd bitcoin
git checkout v0.19.1
Compile and install bitcoin core!
./autogen.sh


# if you built BerkeleyDB
./configure CPPFLAGS="-I${BDB_PREFIX}/include/ -O2" LDFLAGS="-L${BDB_PREFIX}/lib/"

# else
./configure --disable-wallet


# in either case
make
sudo make install
After installing you are ready to run bitcoin daemon and check the status with bitcoin-cli.
# start the bitcoin daemon in daemon mode :-)
bitcoind -daemon
Wait a minute after starting the daemon and running the next command.
# print the status of our local blockchain copy
bitcoin-cli getblockchaininfo
The Bitcoin daemon starts without errors, and we can see the initial block sync has started. It will take a few hours, or even days, depending on your hardware, for that initial block sync to complete. Once complete, the initialblockdownload will change to false, and verificationprogress will hover just below 1.
Forwarding port 8333
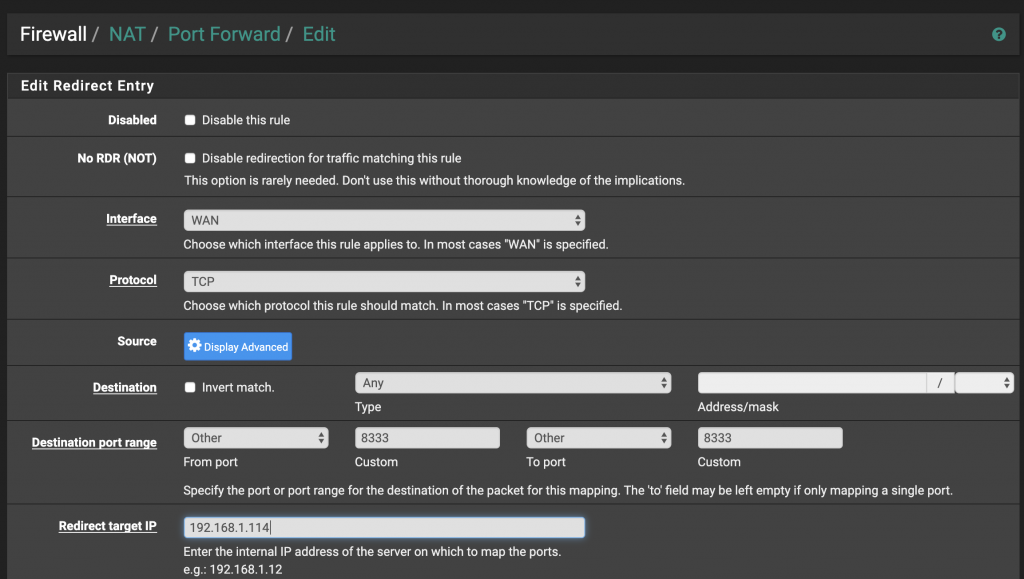
To have a fully functional Bitcoin node, you need to forward incoming connections on port 8333 to the device running Bitcoin core.
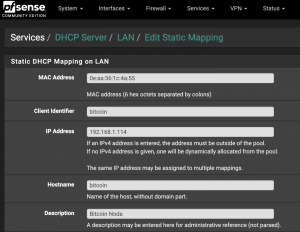
We first assign a static local IP to our bitcoin core host, e.g. 192.168.1.201, then, we create a forwarding rule to that host for all incoming connections on port 8333.
I use pfSense and this is my config for a static IP:

As for forwarding port 8333:
Verifying everything is working
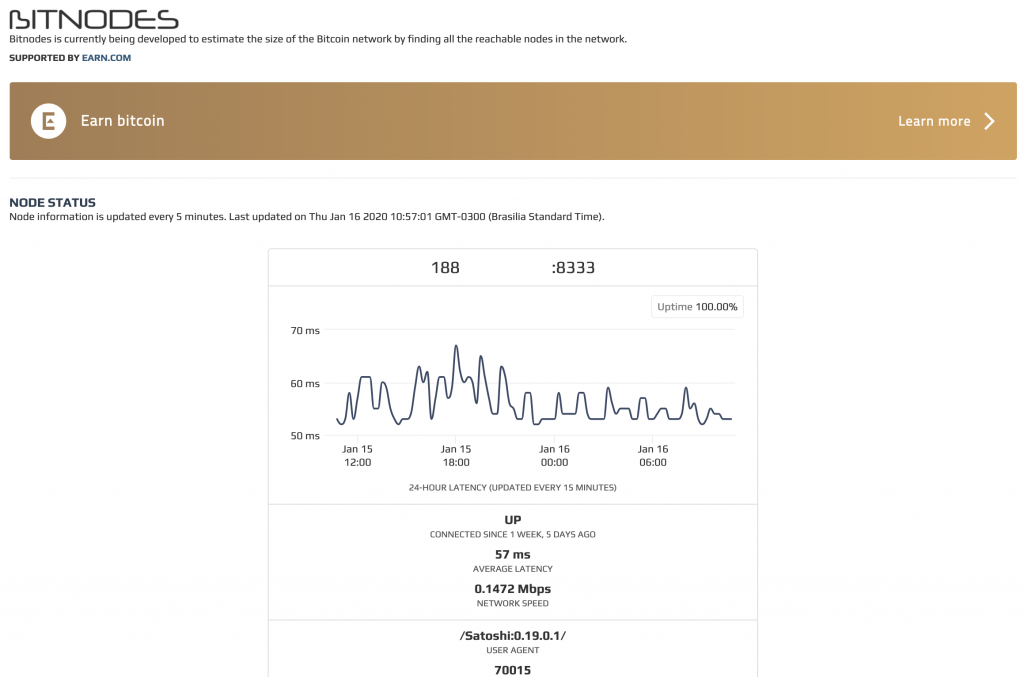
Once the bitcoin node has synced, and if your port forwarding is working properly, you can check your node on https://bitnodes.earn.com/
Your public IP will be populated, and you can simply click on check node. In my case, I see this
Pat yourself in the back! You are supporting the Bitcoin network now.
Optional, auto start bitcoin core after shutdown/restart
The bitcoin daemon will not automatically start if the system shuts down or reboots. To auto start it, we can edit our crontab by running crontab -e, and add the following line to it.
@reboot /usr/local/bin/bitcoind --daemon


